Rock tumbling is a fun hobby that turns rough stones into shiny gems. To get great results, knowing how to use a rock tumbler is key. This tool makes stones smooth, just like nature does.
The process has several steps: coarse grind, medium grind, fine grind, and polish. Each step needs special grit and methods. To do well, follow the maker’s guide and be careful to not mess up the stones.
For more info on rock tumbling, check out Rotary Rock Tumbler Instructions. It’s a detailed guide on using a rotary rock tumbler.
Key Takeaways
- Understand the different stages of rock tumbling: coarse grind, medium grind, fine grind, and polish.
- Choose the right grit for each stage to achieve the desired outcome.
- Follow the manufacturer’s instructions for the rock tumbler.
- Take necessary precautions to avoid contamination and damage to the stones.
- Be patient, as the rock tumbling process can take several weeks to complete.
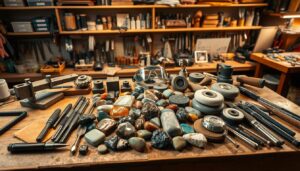
Understanding Rock Tumblers and Their Components
To start with rock tumbling, knowing the different types of rock tumblers is key. Rock tumblers polish and shape stones. They come in various forms, each with its own benefits.
Types of Rock Tumblers: Rotary vs. Vibratory
There are mainly two types of rock tumblers: rotary and vibratory. Rotary tumblers rotate a barrel with stones, grit, and water. This rotation smooths the stones’ surfaces over time. They are great for larger stones and can polish them well.
Vibratory tumblers use vibration to tumble stones. They are faster than rotary tumblers and work with a variety of stone sizes. They are perfect for those who want quick results and are best for smaller stones.
Essential Parts of a Rock Tumbler
Knowing the essential parts of a rock tumbler is important. The main parts are the barrel and the motor. The barrel holds the stones and grit, and the motor powers the tumbling action. Other key parts include the lid and the control unit.
- Barrel: The container where stones, grit, and water are placed.
- Motor: Powers the tumbling action.
- Lid: Seals the barrel to prevent leakage.
- Control Unit: Allows users to set tumbling parameters.
Choosing the Right Size and Power for Your Needs
Choosing the right size and power for your rock tumbler is important. It depends on the size and number of stones you plan to tumble. Larger tumblers can handle more stones but need more power.
When picking a rock tumbler, think about the space you have, the size of stones you want to tumble, and your budget. Smaller tumblers are good for beginners or those with little space. Larger tumblers offer more versatility and capacity.
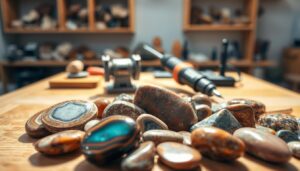
Selecting the Right Rocks for Tumbling
Starting your journey to make stunning polished rocks means picking the right ones. There are many rocks to choose from. It can feel overwhelming to pick the right ones for tumbling.
Ideal Rock Types for Beginners
Beginners should start with soft and easy rocks. Some good rocks for beginners include:
- Agate: It’s known for its bright colors and patterns, making it a favorite.
- Jasper: A type of chalcedony, it’s loved for its unique patterns and colors.
- Petrified Wood: This fossilized wood is beautiful and soft, perfect for beginners.
Rocks to Avoid
Some rocks are not good for tumbling. Hard rocks like diamonds or quartz are hard to polish. Very soft rocks like shale may not last well in the tumbling process.
Preparing Your Rocks Before Tumbling
Before tumbling, you need to prepare your rocks. Clean and sort them, and break big rocks into smaller pieces.
Cleaning and Sorting
First, clean your rocks well to get rid of dirt or debris. Then, sort them by size and type for even tumbling.
Breaking Larger Rocks Safely
For big rocks, you need to break them into smaller pieces. Use a rock saw or a hammer to do this. Always wear safety gear to avoid getting hurt.
| Rock Type | Mohs Hardness | Tumbling Suitability |
|---|---|---|
| Agate | 6.5-7 | Excellent |
| Jasper | 6.5-7 | Excellent |
| Petrified Wood | 5.5-6.5 | Good |
How to Use a Rock Tumbler Properly: Step-by-Step Guide
To get the most out of your rock tumbler, it’s key to know how to use it right. Rock tumbling is a fun hobby that turns rough rocks into shiny gemstones. It involves several important steps for the best results.
Setting Up Your Tumbler
First, set up your tumbler correctly. Place it on a flat, stable surface away from sunlight and moisture. Make sure it’s plugged into a good power outlet and the cord is safe.
Loading the Barrel Correctly
Loading the barrel is a big step. Choose the rocks you want to tumble and clean them well. Fill the barrel about 2/3 full with rocks. Don’t fill it too much, so the rocks can move freely.

Adding the Right Amount of Grit and Water
Next, add the right grit and water. The grit type and amount change with each tumbling stage. For more info, check our guide on rock tumbler instructions. Fill the barrel 1/4 full with grit and add water to cover everything.
Setting the Optimal Tumbling Time
The tumbling time varies based on the rocks and the stage. A cycle can last from days to weeks. Keep an eye on progress and adjust the time as needed.
Noise Reduction Tips
- Place the tumbler on a vibration-absorbing material, such as a rubber mat.
- Ensure the tumbler is level and balanced to reduce vibration.
- Consider running the tumbler during less noise-sensitive hours.
By following these steps and tips, you’ll master your rock tumbler. Remember, patience and detail are key for great results.
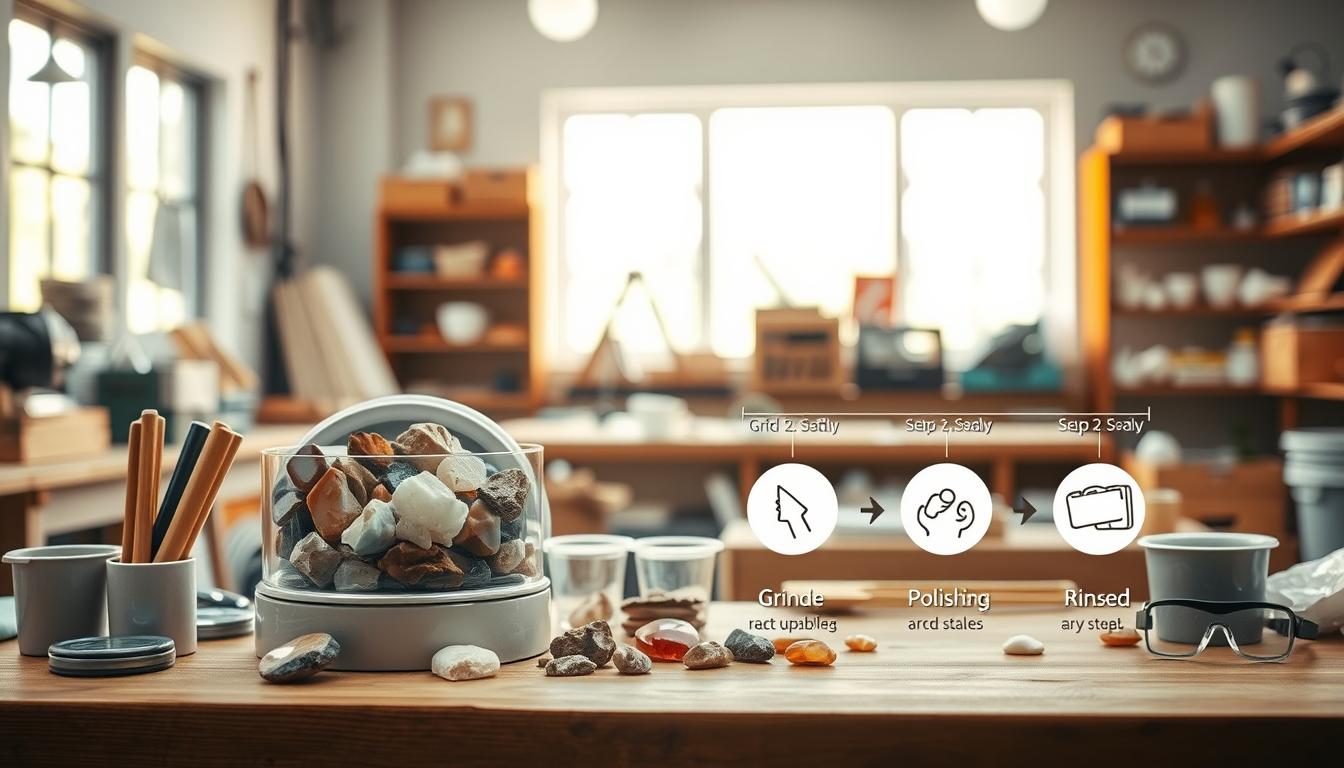
The Four-Stage Tumbling Process Explained
The four-stage tumbling process is a detailed way to polish rocks. It uses finer abrasives in each stage to smooth the rock’s surface. This leads to a polished finish.
Coarse Grind (Stage 1)
The first stage is the coarse grind. Here, a coarse abrasive removes rough edges and initial flaws. The coarse grind is key for shaping the rock and getting it ready for more work.
Medium Grind
After the coarse grind, the rock goes through the medium grind stage. This stage uses a finer abrasive to smooth the rock more. It’s important to clean the rock and tumbler well before this stage to avoid dirt.
Fine Grind (Stage 3)
In the fine grind stage, the rock starts to look polished. An even finer abrasive is used to remove small scratches. This brings the rock closer to its final look.
Polish Stage (Stage 4)
The final stage is the polish stage. Here, a very fine polish is used to get a shiny finish. Care is needed in this stage to clean the rock well and use the polish right.
When to Move Between Stages
Knowing when to move to the next stage is important. You should switch when the rock looks even and has no scratches from the last stage. Checking the rock often helps decide when to move on.

Advanced Rock Polishing Techniques
To get a shiny finish on your rocks, you need advanced techniques. We’ll show you how to polish rocks to perfection.
Using Burnishing for Extra Shine
Burnishing uses a soft material to polish rocks. It makes them very shiny. You’ll need a burnishing compound and a soft cloth.
Put the compound on the cloth and rub it on the rock in circles. Keep doing this until it shines enough for you.
Two-Stage Polish for Exceptional Results
A two-stage polish uses two compounds for a super shine. First, use a coarse compound to fix scratches. Then, use a fine compound for the final shine.
| Polish Stage | Grit Size | Result |
|---|---|---|
| Coarse Polish | 120-150 | Removes scratches and imperfections |
| Fine Polish | 600-800 | Achieves high-luster finish |
Working with Delicate or Unusual Stones
Stones like opals need gentle care. They’re easy to damage. Use a soft cloth and a mild polish.
Don’t use too much pressure or speed. It can hurt the stone.
For more info on rock tumbling and polishing, check out our article on unleashing the brilliance: tumbling and polishing.
Troubleshooting Common Rock Tumbling Problems
Rock tumbling is more than just a process. It’s also about fixing common problems. Issues like uneven tumbling, scratched stones, or barrel leaks can be solved. Knowing how to fix these problems saves time and improves results.
Addressing Uneven Tumbling
Uneven tumbling can cause uneven polishing and damage stones. Make sure your tumbler is balanced and the load is even. Check the manufacturer’s guidelines for loading tips.
Fixing Scratched or Damaged Stones
Scratched or damaged stones might mean you’re using the wrong grit or tumbling too long. Look at your tumbling stages and adjust grit and time. Using a finer grit in later stages can help.
Dealing with Barrel Leaks
Barrel leaks can cause messes and harm your tumbler. Check the barrel and seals for wear or damage. Tightening the barrel lid or replacing seals can fix it.
When to Replace Parts vs. When to Repair
Decide if to replace or repair parts based on damage. For small issues, like a loose lid, just tighten it. But for big damage, like barrel cracks, replacement is best.
[link-whisper-related-posts]Conclusion
Rock tumbling is a mix of art, patience, and precision. It turns rough stones into shiny gems. Kramer Industries has top-notch supplies to start your journey.
The process has several steps: coarse grind, medium grind, fine grind, and polish. Each step needs the right grit, water, and time. Being patient and persistent is key to great results.
To see your rocks’ natural beauty, check out Kramer Industries’ beginner’s guide. With the right tools and techniques, you can make beautiful polished stones.
By following these steps and using the right tools, you can show off your rocks’ unique beauty. Rock tumbling is a rewarding hobby that’s worth the effort.
FAQ
What is the best type of rock tumbler for a beginner?
Beginners should start with a rotary rock tumbler. It’s cheaper and simpler to use. Lortone and Thumler’s make good rotary tumblers.
How long does it take to polish rocks using a rock tumbler?
Polishing time varies. It depends on the rock type, tumbler quality, and polish level. It can take weeks to months.
What kind of rocks are suitable for tumbling?
Hard, dense rocks like agate, jasper, and quartz work well. Softer rocks like shale or sandstone don’t.
How do I maintain my rock tumbler to ensure it lasts?
Clean it after each use. Check for wear on the barrel and gaskets. Make sure it’s balanced.
Can I tumble multiple types of rocks together?
No, tumbling different rocks together is not a good idea. They have different hardness levels, which can mess up the process.
What is the purpose of the different grit stages in rock tumbling?
Grit stages smooth and polish rocks. Coarser grit removes imperfections first. Then, finer grit makes it shiny.
How do I know when to progress to the next grit stage?
Move to the next grit when the current one scratches the rock evenly. There should be no scratches from before.
Subscribe to Our Newsletter