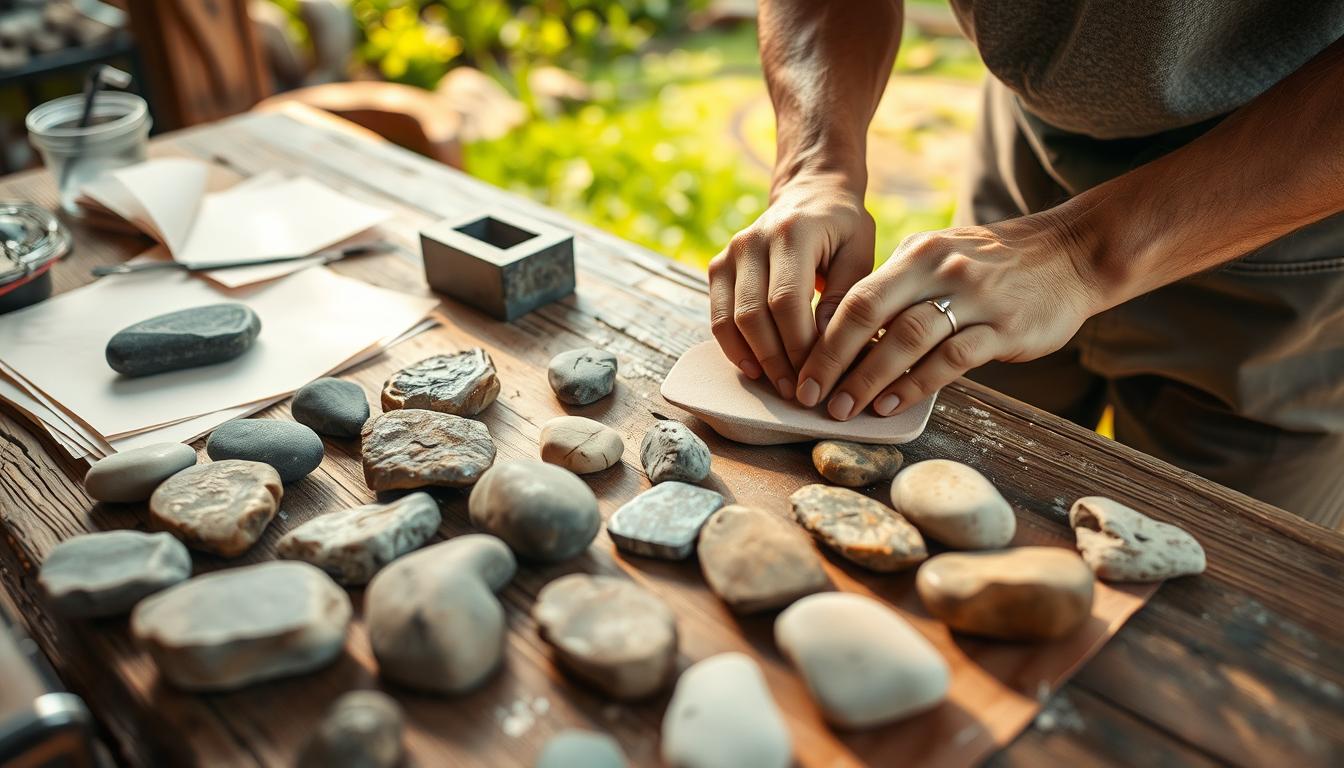
Sanding and smoothing stones is a fun DIY project. It makes rocks and stones look better. You can make rough stones smooth and shiny with the right tools and methods.
Sanding stones helps remove blemishes and rough spots. Smoothing stones gives them a shiny finish. You can use sandpaper, toothpaste, and other DIY tricks to do this.
With a step-by-step guide, you can get great results at home. This guide will help you make decorative stones or enjoy the rock grinding process.
Key Takeaways
- Understand the basics of sanding and smoothing stones
- Learn the materials needed for DIY stone polishing
- Discover various techniques for rock grinding
- Follow a step-by-step guide for achieving smooth stones
- Explore different methods for sanding stones at home
Understanding Stone Types and Their Properties
Different stones have unique properties. These properties affect how they can be sanded and smoothed. Knowing the type of stone you’re working with is key to the best sanding and polishing methods.
Common Stones Suitable for Hand Sanding
Granite, marble, and soapstone are great for hand sanding. They are durable and look good, making them perfect for decorative items and furniture. For more info on stone processes, check out https://make.works/blog/stone-processes.
Hardness Scale and What It Means for Sanding
The hardness of a stone is very important for sanding. The Mohs hardness scale ranks stones from 1 (softest) to 10 (hardest). Harder stones need more aggressive sanding tools.
Identifying Good Candidate Stones for Your Projects
When picking stones for your projects, think about their hardness, texture, and use. Soft stones like soapstone are great for detailed carvings. Harder stones like granite are better for heavy tasks.
| Stone Type | Mohs Hardness | Suitability for Hand Sanding |
|---|---|---|
| Granite | 6-7 | High |
| Marble | 3-4 | Moderate |
| Soapstone | 2 | High |
Essential Tools and Materials for Hand Sanding Stones
To sand stones by hand, you need the right tools and materials. The quality of your equipment matters a lot.
Sandpaper Grades and Their Specific Uses
Different sandpaper grades are for different sanding stages. Coarse grits (80-120) remove big imperfections. Medium grits (220-320) smooth the surface. Fine grits (400-600) polish it well. Picking the right sandpaper is key for a good finish.
Specialized Stone Sanding Tools and Accessories
Tools like diamond-coated sanding pads and grinding stones work great for sanding stones. For more tips on polishing rocks, check out wikiHow’s guide.
Safety Equipment You Shouldn’t Skip
Don’t forget safety gear like dust masks, goggles, and gloves. They protect you from sanding hazards.
Setting Up a Sanding Kit on a Budget
Start a sanding kit with basics: sandpaper, a sanding block, and safety gear. As you get better, add more tools to your kit.
Setting Up Your Workspace for Stone Sanding
A well-organized workspace is key for safe and efficient stone sanding. Think about the layout and tools you’ll need.
Creating an Ergonomic Sanding Station
An ergonomic sanding station helps prevent fatigue and boosts your sanding quality. Make sure your work surface is at a comfy height. Use a sanding block or ergonomic tools to ease hand and wrist strain.
Proper Lighting and Ventilation Considerations
Good lighting is vital for checking your stone’s surface and spotting flaws. Also, proper ventilation is key to avoid dust inhalation. Use a dust collector or work in a well-ventilated spot.
Containing Mess and Dust Management
Stone sanding makes a lot of dust. Use a dust containment system or work on a cleanable surface. Clean your workspace often to stop dust from flying around.
How to Sand and Smooth Stones by Hand: Step-by-Step Process
To get a smooth finish on stones, follow a few steps. Sanding and smoothing stones by hand needs patience and the right techniques. You also need to know about the stone’s properties.
Initial Assessment and Stone Preparation
Before sanding, check the stone’s condition and prepare it. Clean the stone to remove dirt or debris. Look for any big flaws.
Coarse Sanding Techniques to Remove Major Imperfections
Coarse sanding is the first step. Use sandpaper with a coarse grit (80-100) to sand in a circular motion. This removes big flaws and rough spots.

Medium and Fine Sanding Methods for Smoothing
After coarse sanding, use a medium-grit sandpaper (120-150) and sand in a circular motion. This makes the stone smoother. Then, use a fine-grit sandpaper (220 or higher) for the highest smoothness.
Final Polishing for a Professional Finish
For a professional look, polish with a compound or toothpaste on a soft cloth. Rub in a circular motion, then buff with a clean, dry cloth. This brings out the stone’s natural shine.
By following these steps, you can make a stone look beautiful and smooth.
Advanced Stone Smoothing Techniques
Advanced stone smoothing techniques are key for top-notch finishes on stone. Knowing the different methods is vital for stoneworkers.
Wet Sanding vs. Dry Sanding: When to Use Each
Wet sanding works great for dense stones like granite and marble. It uses water to lower friction and prevent heat damage. Dry sanding is best for softer stones like limestone and sandstone. It avoids moisture damage or color changes.
Creating Different Textures and Finishes
To get a shiny finish, use finer grits of sandpaper and polish. For a flat finish, sand with a fine grit and polish flat. The finish depends on the stone’s use and your taste.
| Finish Type | Sanding Technique | Polishing Compound |
|---|---|---|
| High Gloss | Progressively finer grits | High-gloss polishing compound |
| Matte | Fine grit sandpaper | Matte polishing compound |
Working with Challenging Stone Shapes and Features
Flexible sanding tools are great for odd-shaped stones. Sanding sticks or custom tools help reach hard spots. These tools offer better control and enhance the finish quality.

Troubleshooting Common Stone Sanding Problems
Sanding stones can be a fun hobby, but it comes with its own set of challenges. Whether you’re a seasoned rockhound or just starting, you’ll face common problems. We’ll look at these issues and offer solutions to help you get past them.
Dealing with Scratches and Uneven Surfaces
Scratches and uneven surfaces are common when sanding. First, check your stone to find the problem. For small scratches, use a finer grit sandpaper to fix them. For bigger scratches, go back to an earlier sanding stage.
To avoid uneven surfaces, sand evenly and apply consistent pressure. Use a sanding block to keep your sandpaper flat and prevent uneven wear.
Solutions for Hard-to-Reach Areas
Some stones have tricky shapes that make sanding hard. Use special sanding tools like sanding sticks or flexible pads for these areas. These tools help you get into tight spaces and sand complex shapes better.
Try different sanding techniques, like gentle touch or circular motion, to reach these spots.
Fixing Mistakes and Saving Problem Stones
Mistakes can happen even with careful planning. If you make a mistake, don’t worry. You can often fix it by going back to an earlier stage or using a different technique. For example, if you’ve sanded too hard and made a scratch, use a finer grit sandpaper to smooth it out.
If you’re not sure what to do, look for online guides, likeguides on polishing rocks with sandpaper, for help.
Knowing about common problems and having solutions can help you achieve great results. Whether you’re sanding for decoration or a crafting project, solving these issues is key.
[link-whisper-related-posts]Conclusion
Sanding and smoothing stones by hand is a fun DIY project. It lets you make unique pieces that show off the stone’s natural beauty. By following the steps in this article, you can get a top-notch finish on your stone projects.
Remember, patience and detail are key to successful stone sanding. Use fine silicon carbide abrasives and keep water flowing to get a smooth finish. For tips on sanding marble, check out this resource.
With practice, you can do many stone sanding and smoothing projects. These can be decorative or useful items. Whether you’re experienced or new, this article’s techniques will help you get great results. Your stone projects will come to life.
FAQ
What type of sandpaper is best for sanding stones?
Silicon carbide or aluminum oxide sandpaper works well on hard stones. Start with 80-100 grit sandpaper to remove big imperfections. Then, use 220-320 grit for smoothing, and 400-600 grit or higher for polishing.
How do I choose the right stone for hand sanding projects?
Choose stones based on hardness, texture, and size. Softer stones like limestone are easier to sand. Harder stones like granite need coarser sandpaper. Look for stones with interesting shapes for unique projects.
What safety equipment is necessary for stone sanding?
Wear safety glasses, a dust mask, and gloves for protection. Safety glasses keep debris out of your eyes. A dust mask stops you from breathing in dust. Gloves help you grip and protect your hands.
Can I sand stones wet, or should I sand them dry?
Wet sanding reduces dust and prevents scratches, good for finer grits. Dry sanding is for coarse grits and removing big imperfections. Choose based on the stone, sanding stage, and your preference.
How do I create different textures and finishes on stones?
Use different grits, techniques, and tools for various textures and finishes. Coarse grits make rough textures, while fine grits polish. Try specialized tools for unique effects.
What are some common mistakes to avoid when sanding stones by hand?
Avoid applying too much pressure to prevent scratches. Don’t skip grits, as it can damage the stone. Always wear safety gear and work in a well-ventilated area.
How can I fix scratches or uneven surfaces on a stone?
For minor scratches, use finer grit sandpaper until the scratch is gone. For bigger damage, go back to coarser grit, then finer grits again for a smooth finish.
Subscribe to Our Newsletter